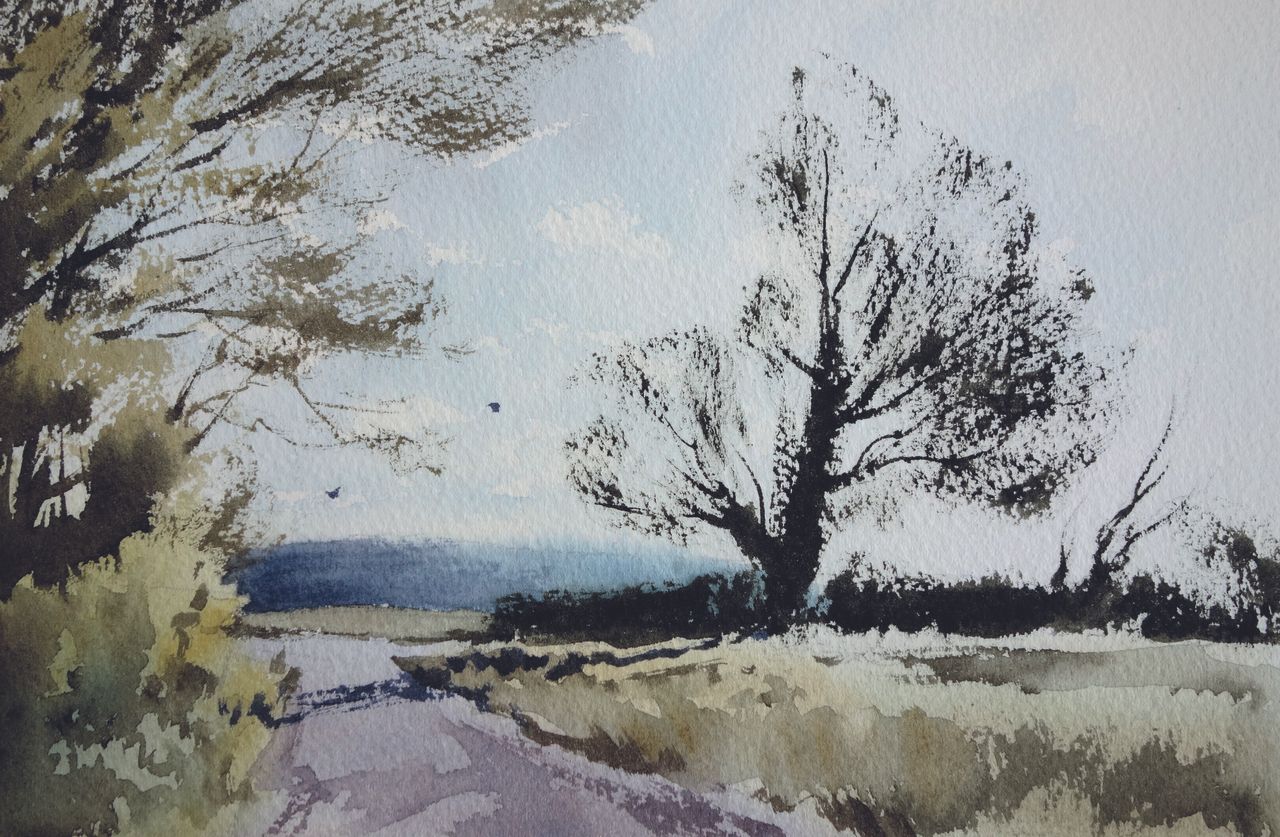
Creating a Unified Tree in Art
When painting trees, especially in an artistic context, the goal is often to create a sense of unity between the foliage and the branches. This technique is particularly effective when you’re aiming for a visual effect that mimics the way we see trees when looking towards the light. In such scenarios, internal details become less prominent, and the focus shifts to the outer edges of shapes. The result is a more simplified representation where the tree appears as a cohesive form rather than a collection of individual elements.
To achieve this effect, it’s important to understand how light interacts with the subject. When light hits the tree from the front, the shadows on the backside are more pronounced, creating a silhouette. This approach allows the artist to emphasize the shape and structure of the tree without getting lost in intricate details.
For those interested in learning more about artistic techniques, there are several tutorials available that can help refine your skills. These include:
- How to draw a cat
- How to create a colour chart
- How to avoid mixing muddy colours
These resources offer valuable insights into different aspects of art and can be a great starting point for beginners and experienced artists alike.
Step-by-Step Guide to Painting a Tree
1. Paint the Trunk

The first step in creating a tree is to paint the trunk. It’s recommended to use either Rough or Not surface paper, as these surfaces provide a better texture for the brush strokes. Load a medium-sized brush with fairly thick paint, then begin by pressing the brush firmly against the paper at the base of the trunk. Drag the brush quickly upwards along its length, allowing the texture of the paper to break up the stroke, giving it a natural look.
2. Branch Out
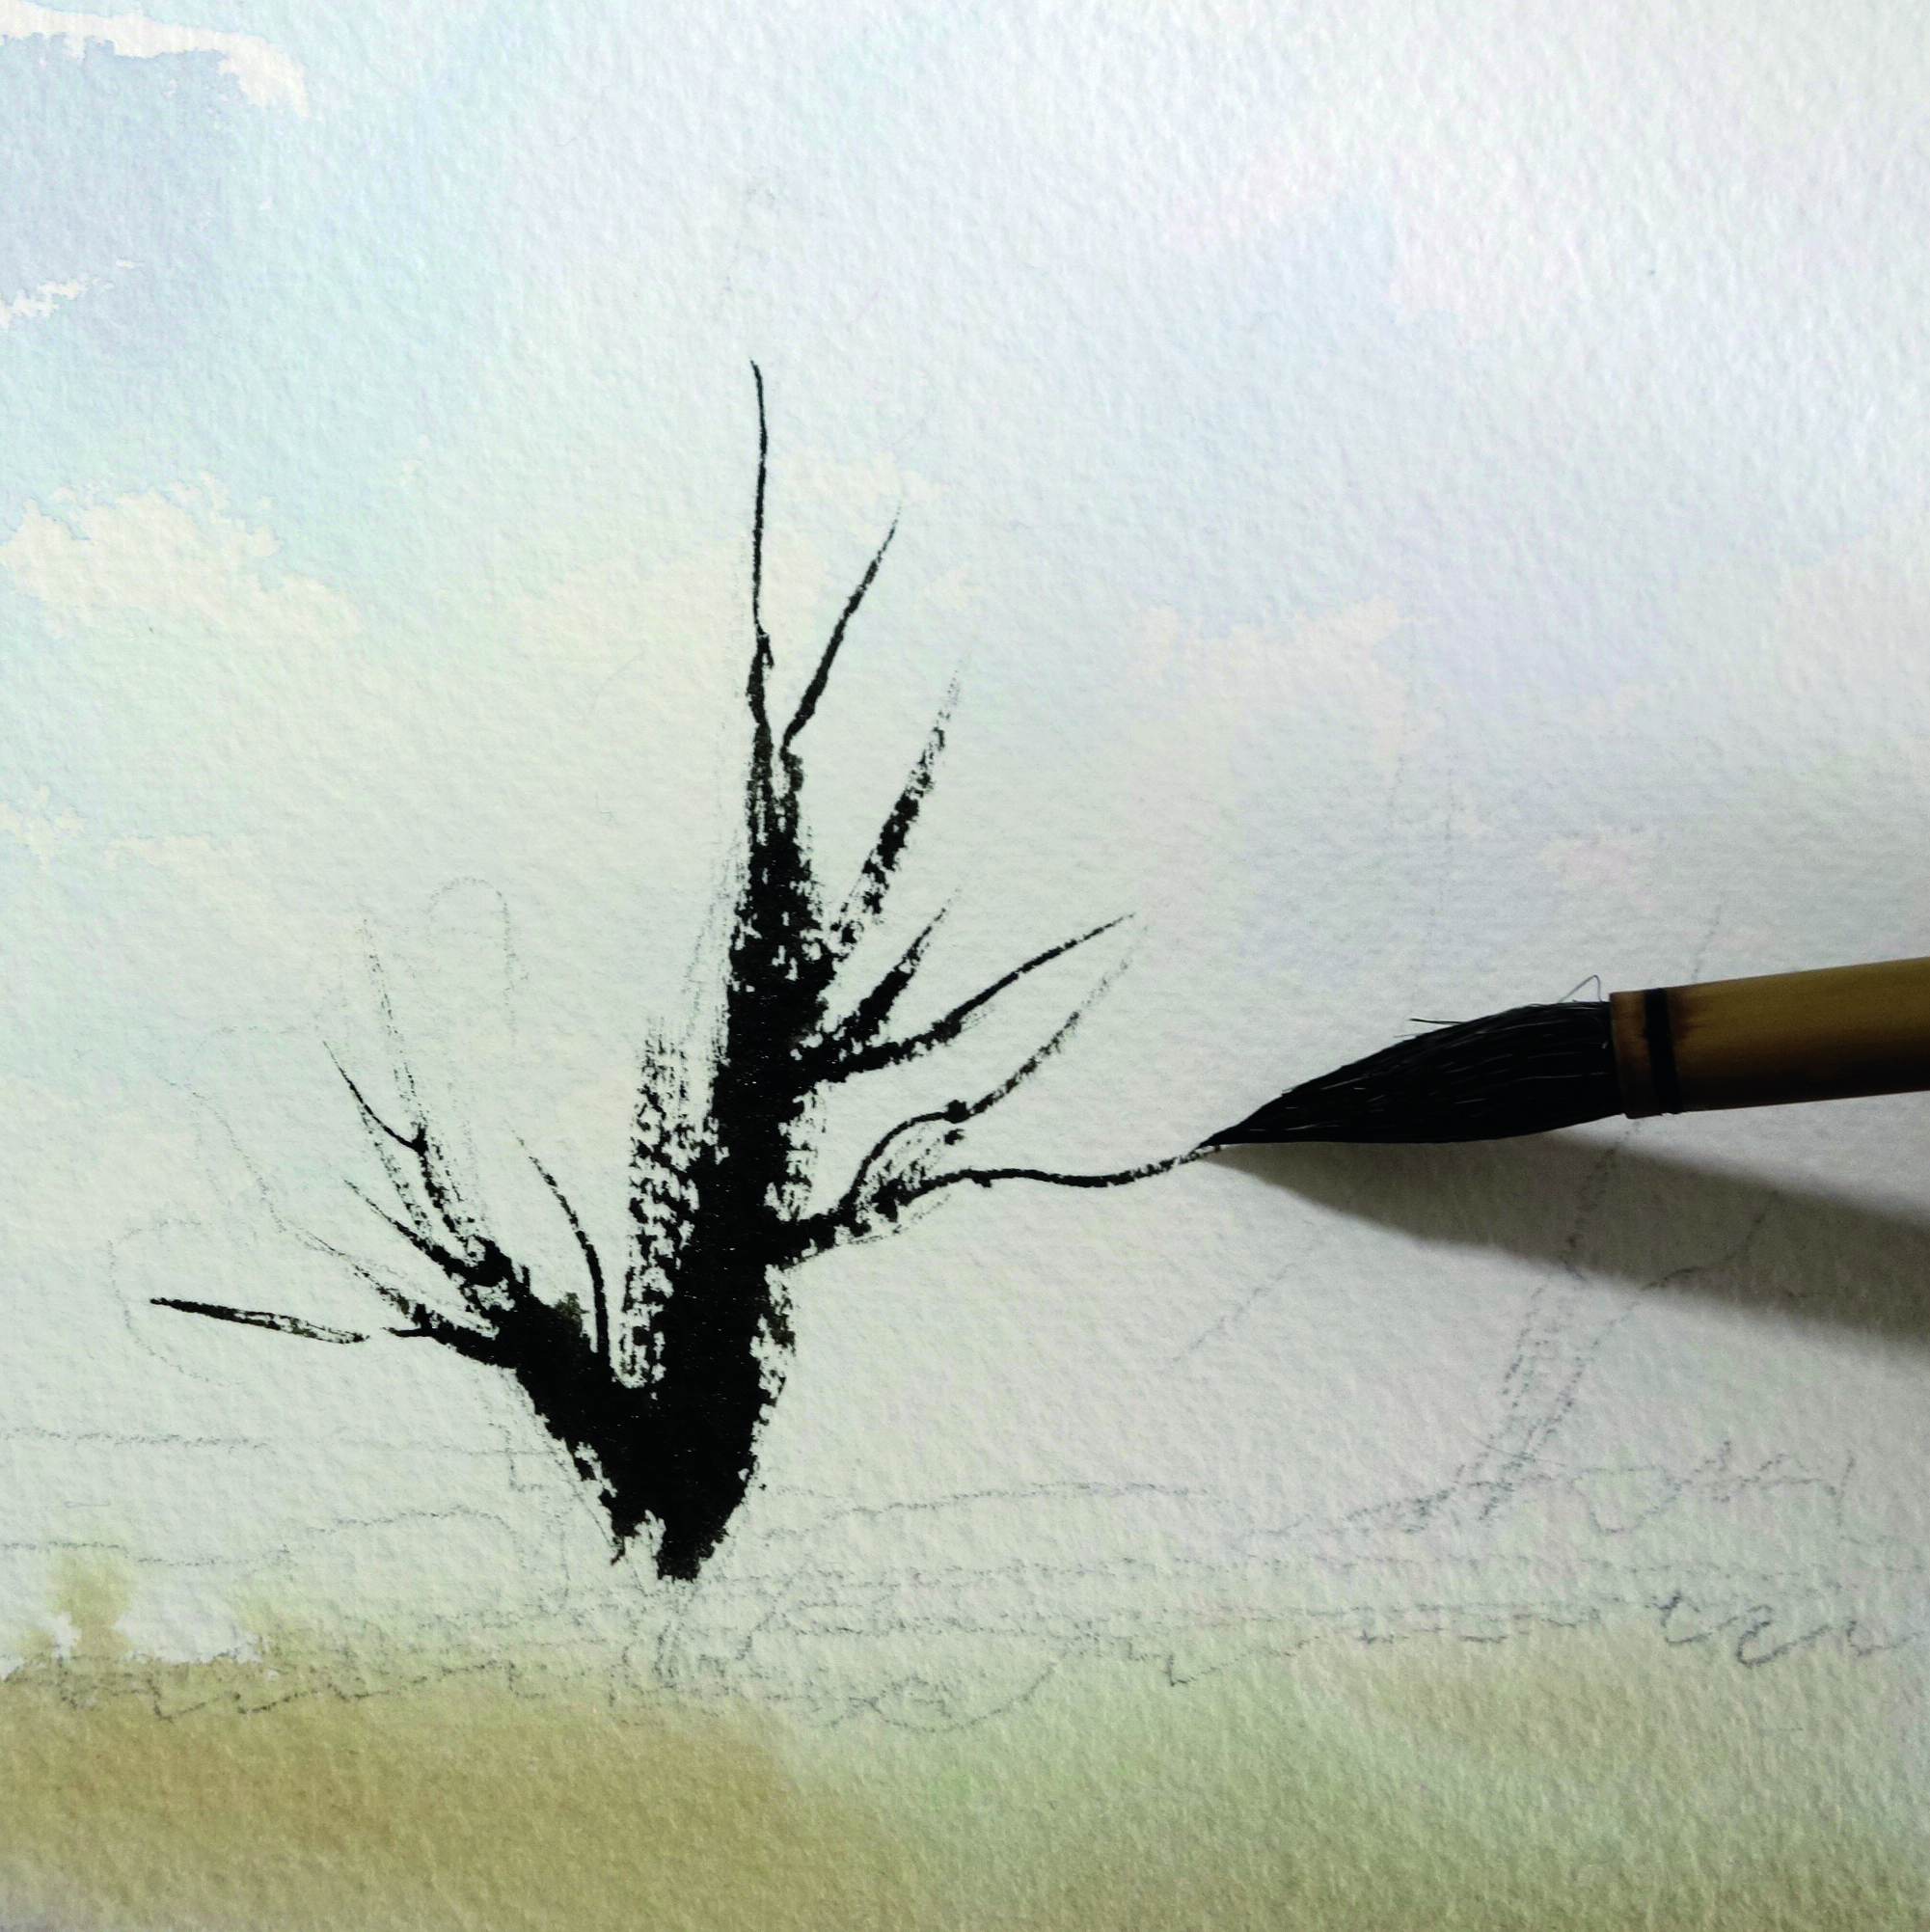
Once the trunk is in place, it’s time to add the branches. Use the tip of the brush to draw out some fine lines representing the branches. However, don’t overdo it—just focus on the largest branches. At this stage, the tree may resemble a winter one, but in the next step, we’ll add the spring foliage. You’ll find that you don’t need to paint hundreds of branches to achieve a realistic effect.
3. Add Your Foliage
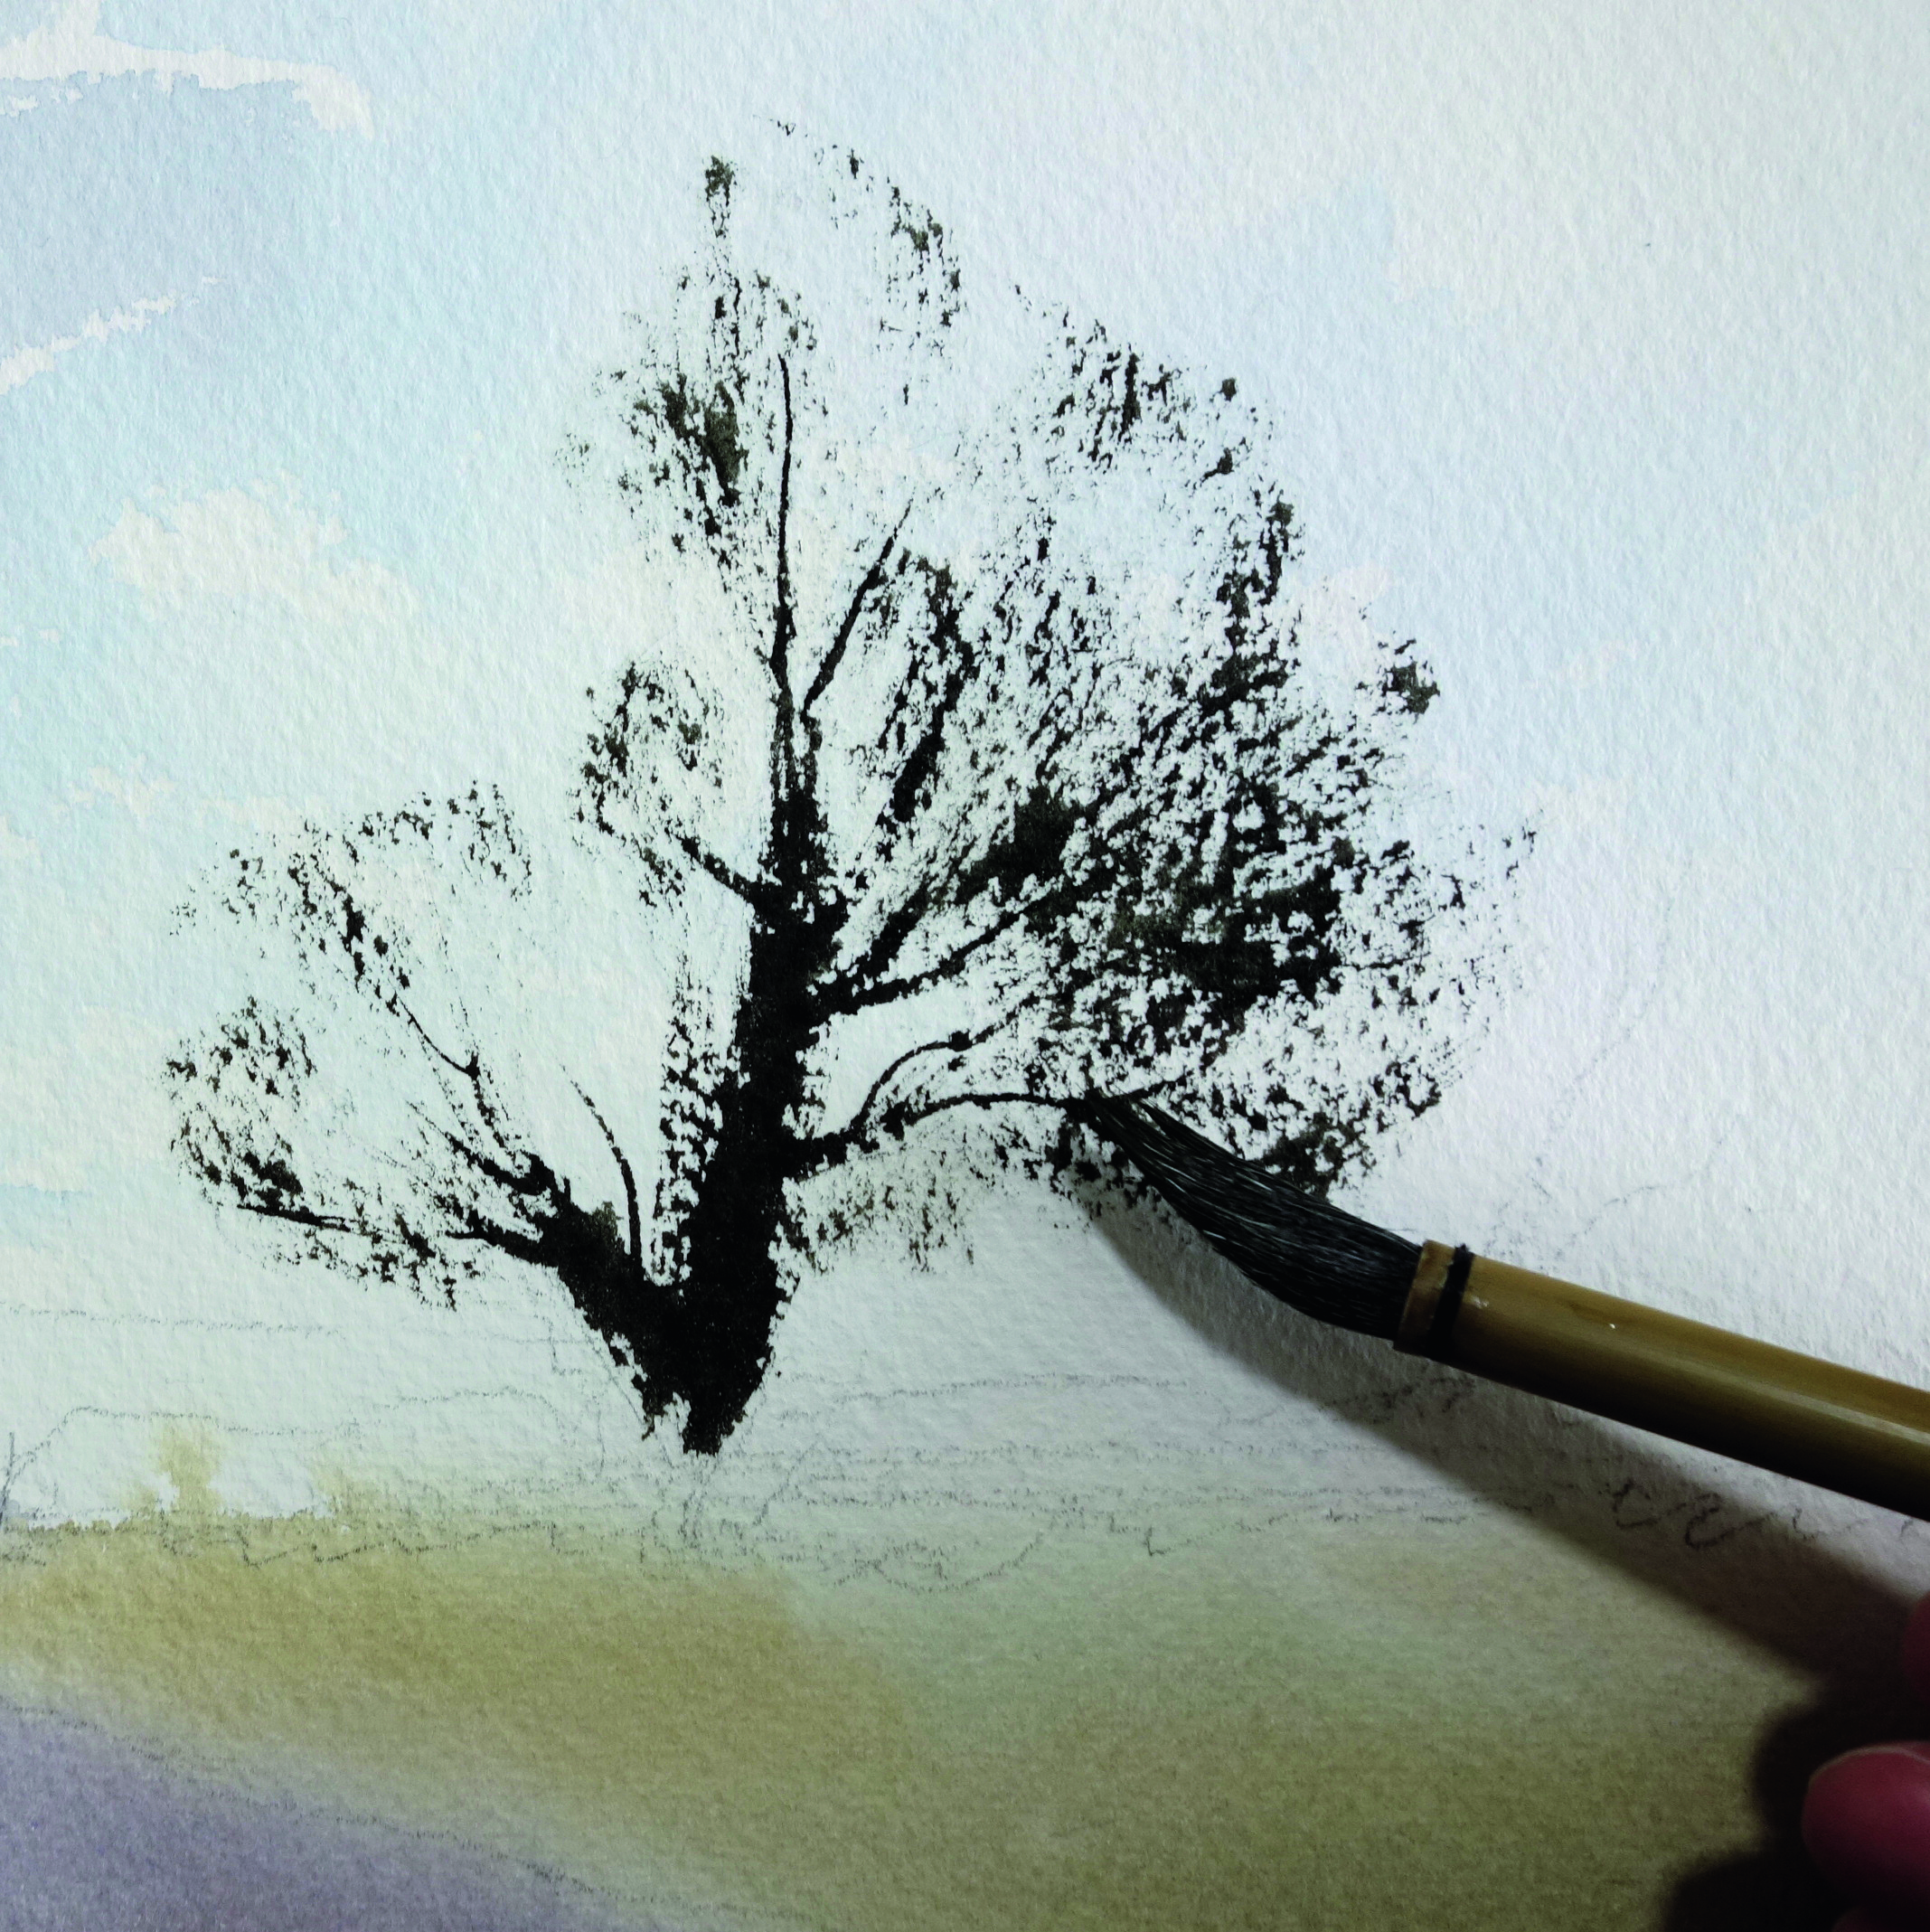
Now, it’s time to add the foliage. Use the side of your brush without re-loading it, so it’s quite dry. Test the technique on some scrap paper before applying it to the tree. If you’re happy with the result, start at the outside of the tree and make drags inward. You may need to press the brush slightly, but go cautiously at first. This technique is similar to shading with a crayon, offering a unique texture to the foliage.
4. Add a Little More
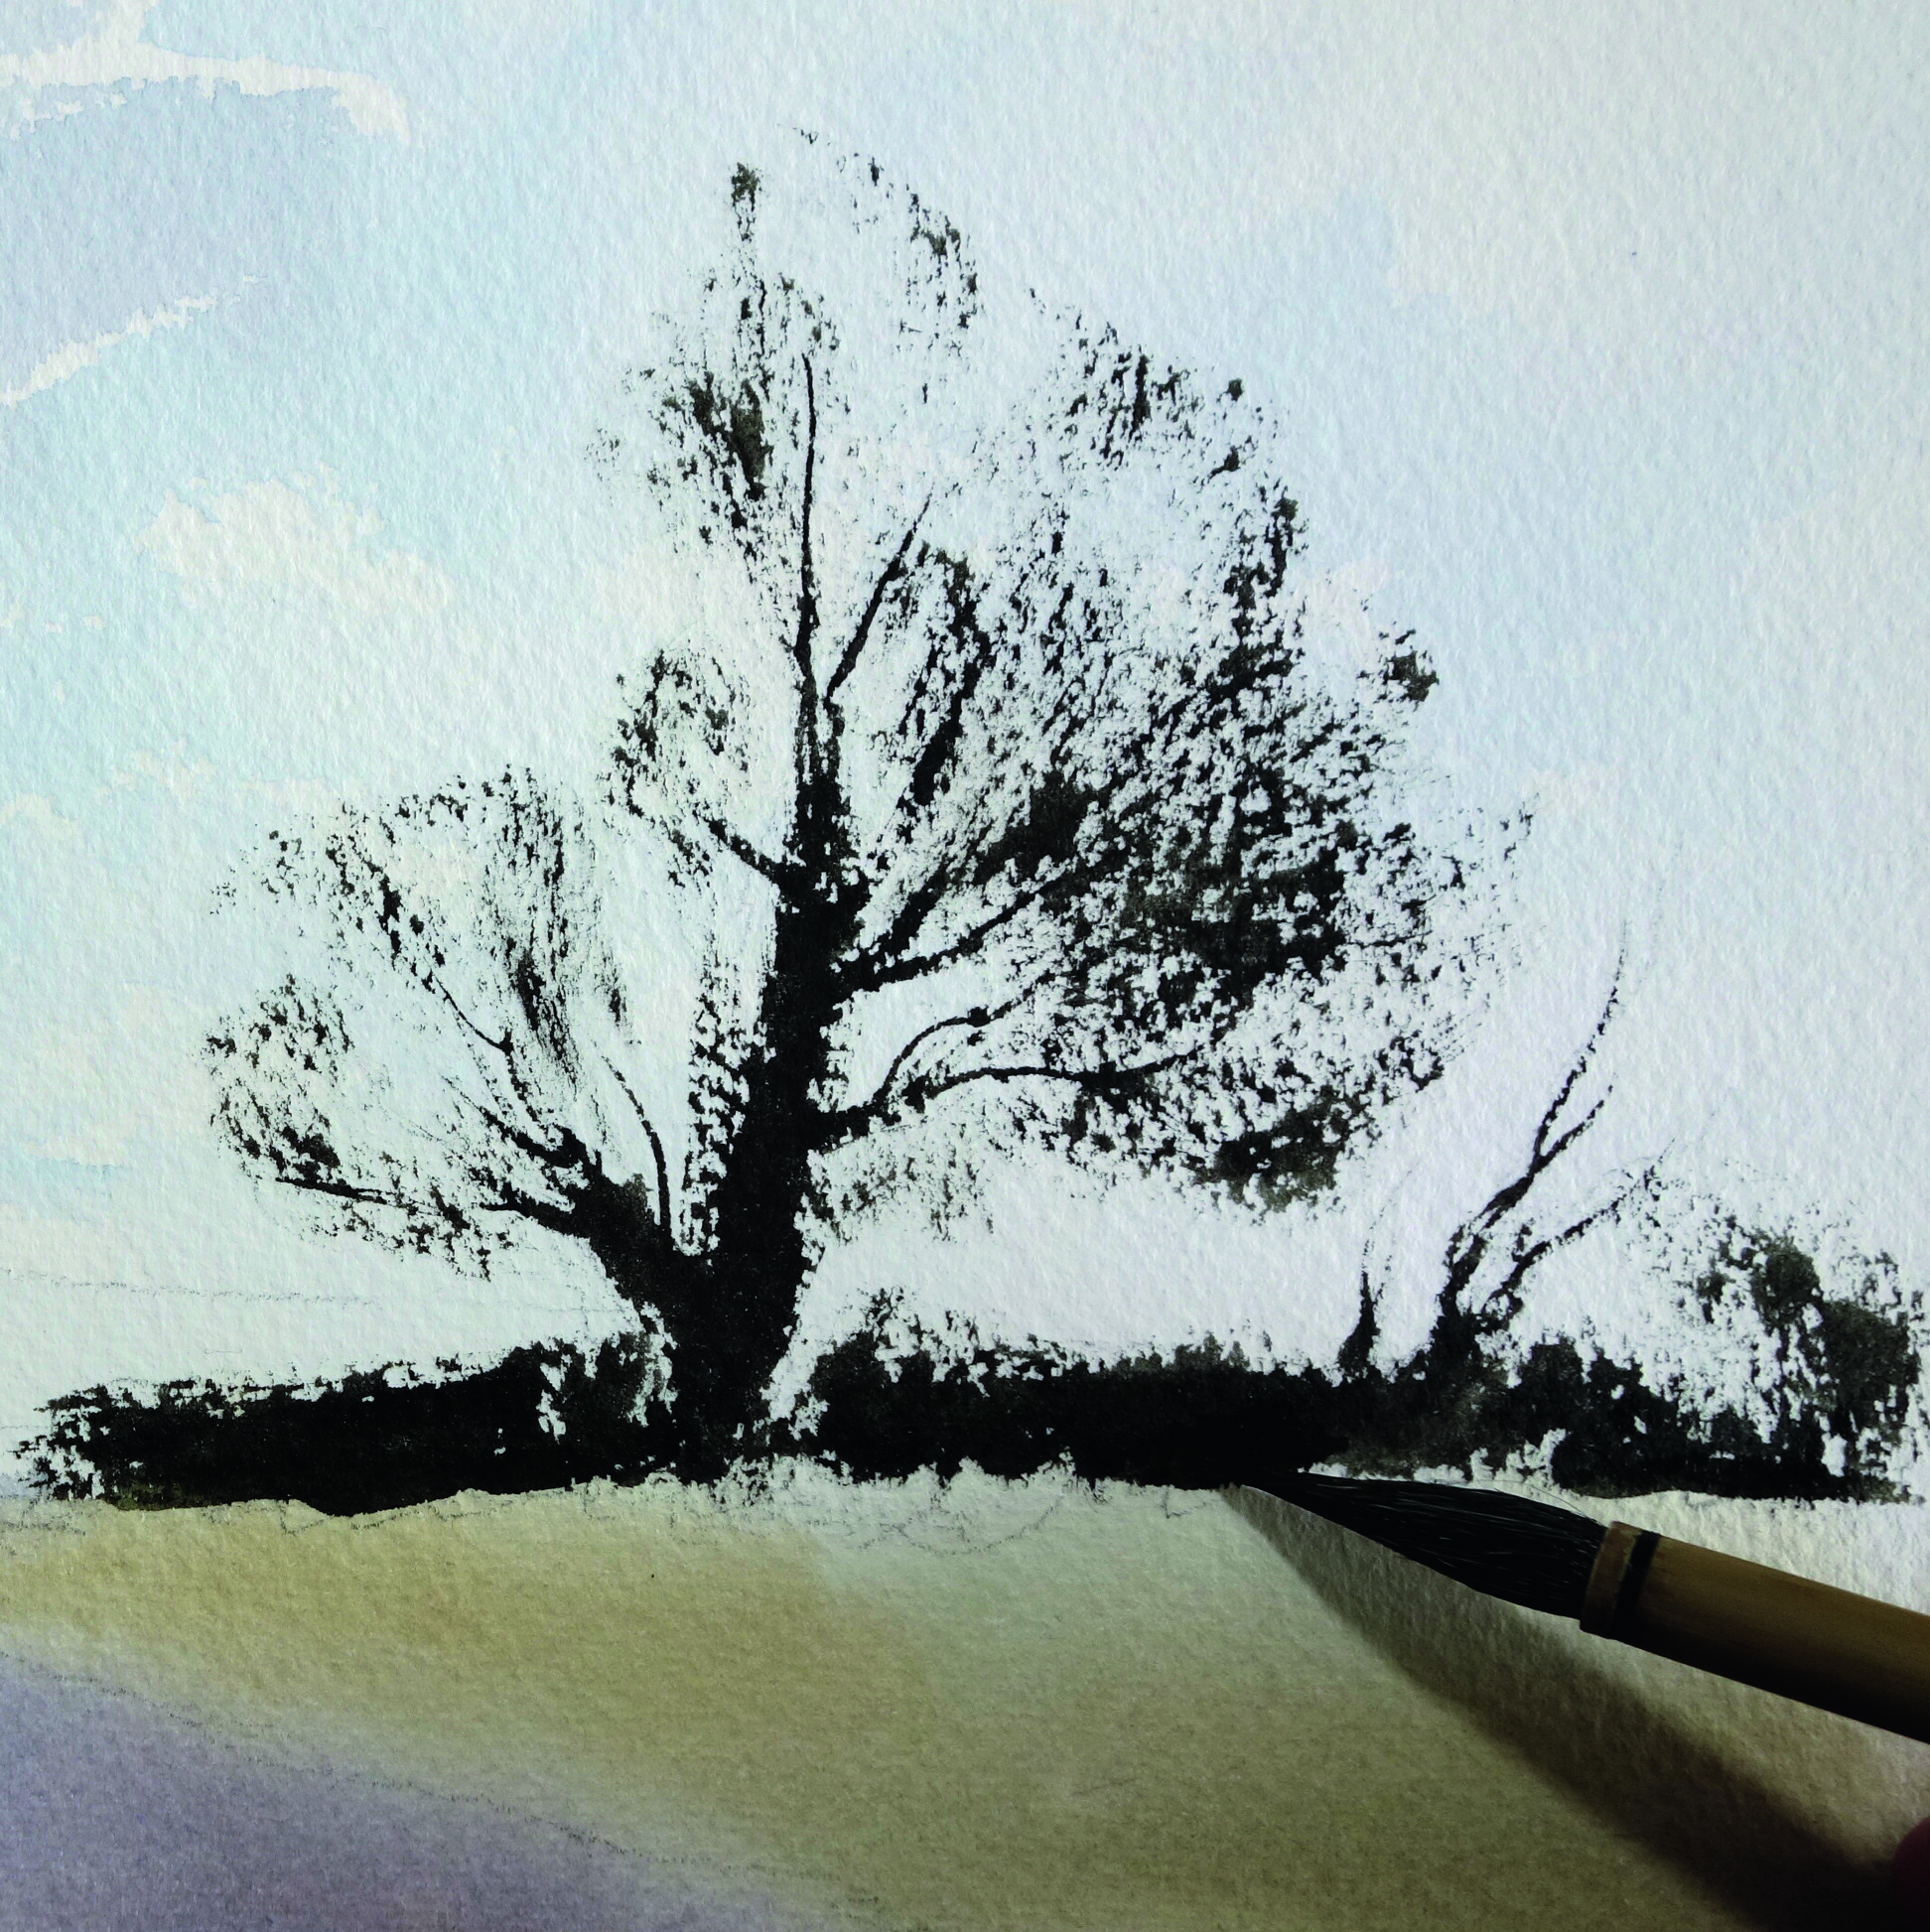
Use the same method to describe the hedgerow. Mix up your marks using both the side and tip of the brush, pressing down firmly when you want a stronger, more solid mark. Finally, dampen the brush to create a cleaner edge along the bottom of the hedgerow where it meets the grass. This will contrast nicely with the rougher top edge, adding depth and dimension to the overall composition.
By following these steps, you can create a visually appealing tree that captures the essence of nature while maintaining a unified and cohesive look. This technique is ideal for artists looking to simplify their work while still achieving a realistic and dynamic result.