A Simple 4-Minute Updo That Will Save Your Hair
If you’re like me, the thought of spending two hours trying to blow-dry your hair or create a perfect slick back is enough to make you want to cry. It often ends with sweat on your upper lip, tangled hair, and pacing around your room, trying to hold everything in place. But what if there was a way to achieve a polished look in under five minutes?
This updo hairstyle, which I discovered through a TikTok from @charleyxcarter, has become my new go-to. It’s easy, quick, and looks great for both casual and formal occasions.
What You’ll Need
Before you start, gather the following tools:
- A bristle brush to smooth your hair
- Two hair elastics
- A handful of bobby pins
- Something to slick down frizzy bits — hair oil or hairspray work well
- A hair straightener or curler for the front pieces
For best results, start with slightly dirty hair. Day three or four is ideal, or even day two if you tend to touch your hair a lot.
Step-by-Step Guide
Step 1: Brush and Separate
Brush through all your hair and separate two thick front pieces. These will be split later, so be generous with how much you take. Clip them to the front of your head in a stylish way.
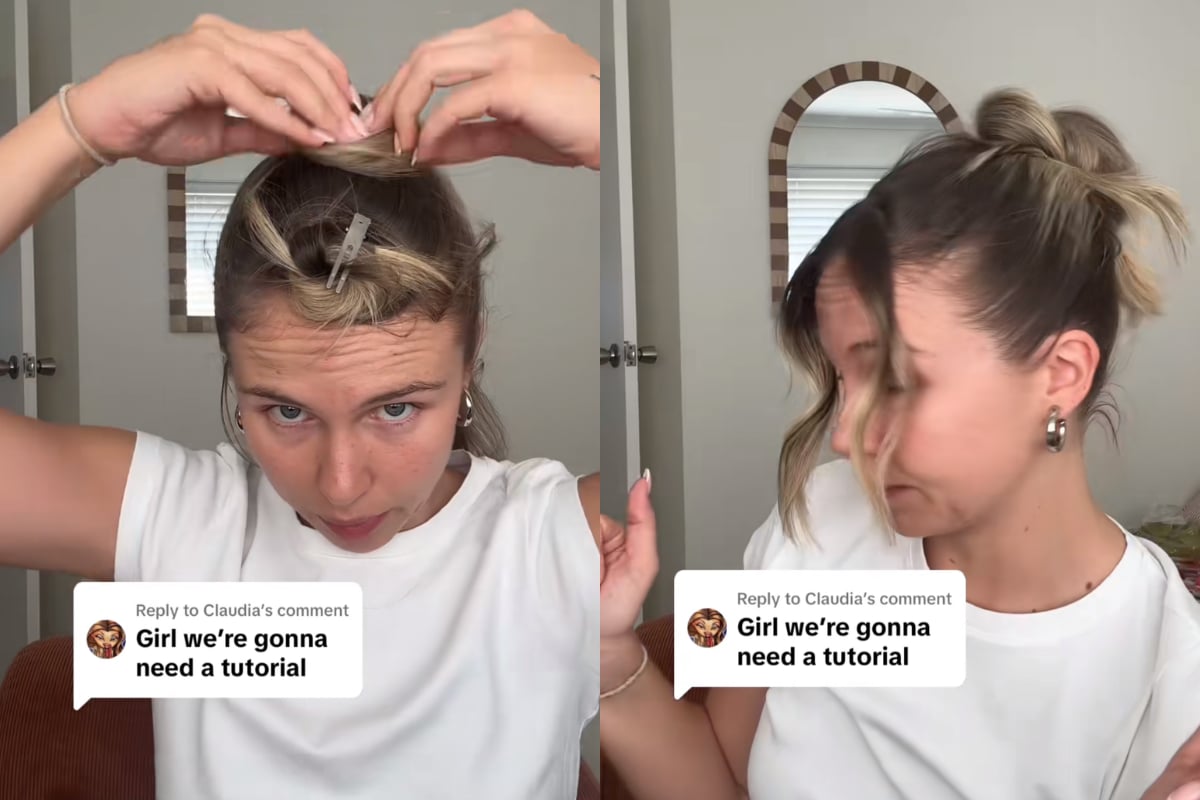
Image: TikTok/ @charleyxcarter.
Step 2: Create the First Ponytail
Starting from your ears, take half of your hair and slick it back into a half-ponytail. Loop it through the hair-elastic so it’s pulled halfway through. Leave the little end pointing down towards the bottom of your hair. The goal is to create a two-horned unicorn look.
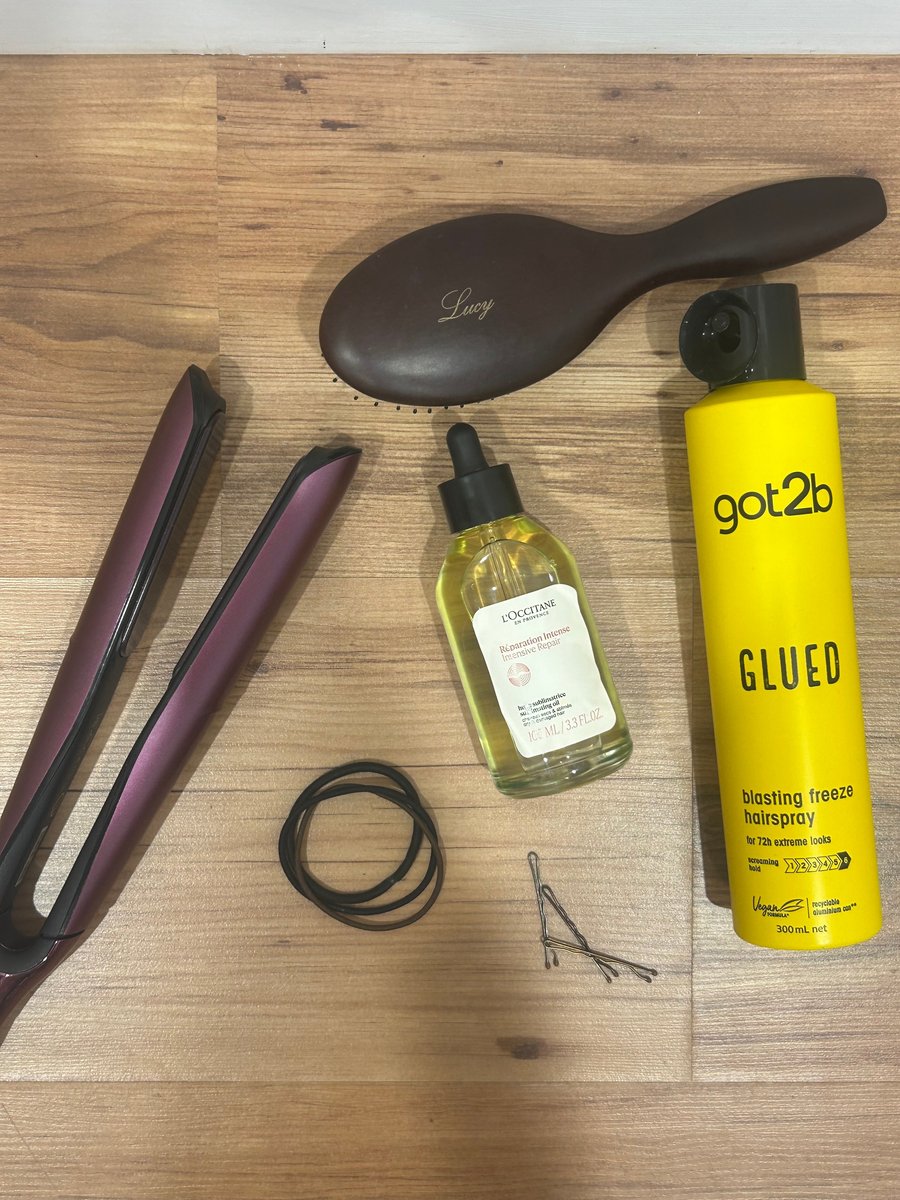
Image: Supplied.
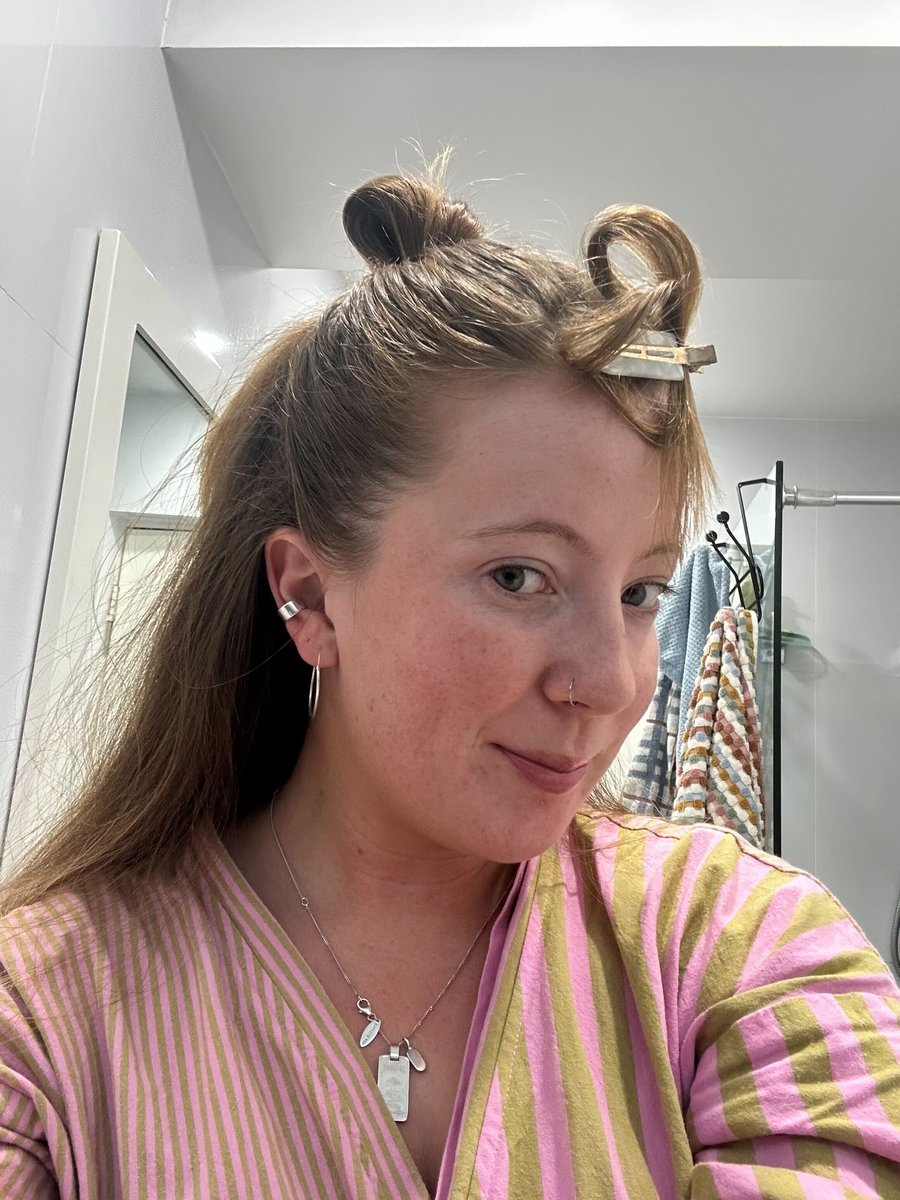
Step 3: Add the Second Ponytail
Use the second hair-elastic to do the same to the rest of your hair. Make sure the little end of the first pony is tied into the second one. Pull this through so it’s the same half-bun situation. They should be as close to each other as possible.
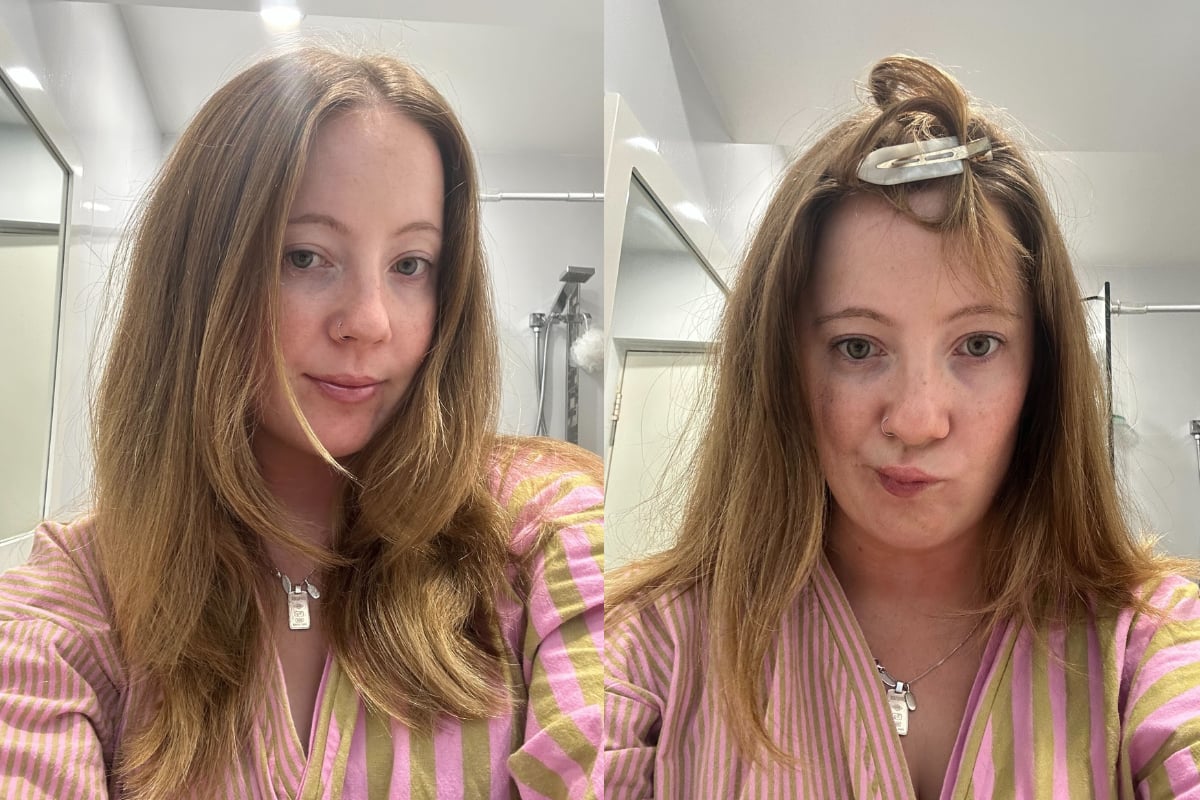
Exhibit A. Image: Supplied.
Step 4: Add the Final Touch
Now it gets a bit technical. Grab the second bun and bring it through the hole of the first one. Use bobby pins to secure it in place. You can also bring down those front pieces now, as they’re ready to shine.
Neigh. Image: Supplied.
Step 5: Finish with Style
Split the front pieces in half and twist the back pieces into your bun. This step creates the ‘snatched’ look that covers the top of your head. For final touches, use your curler or straightener to add some curls or waves to the front pieces and any loose strands.
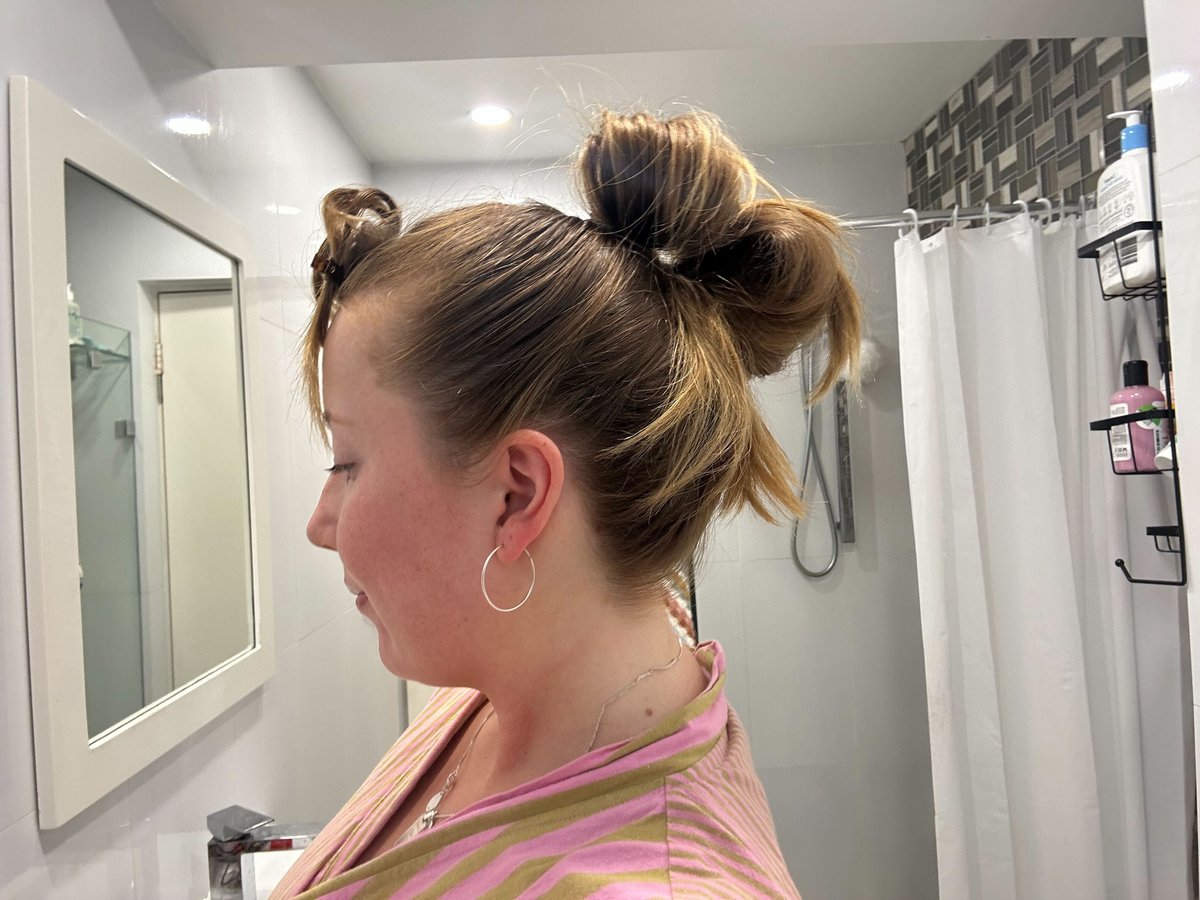
Image: Supplied.
Final Result
After about four minutes of work, plus a little primping, I was amazed at how good the final result looked. I love a messy, tousled look, which works well when some hair is flying around. If you prefer something sleeker, you can adjust by adding more gel or wax.
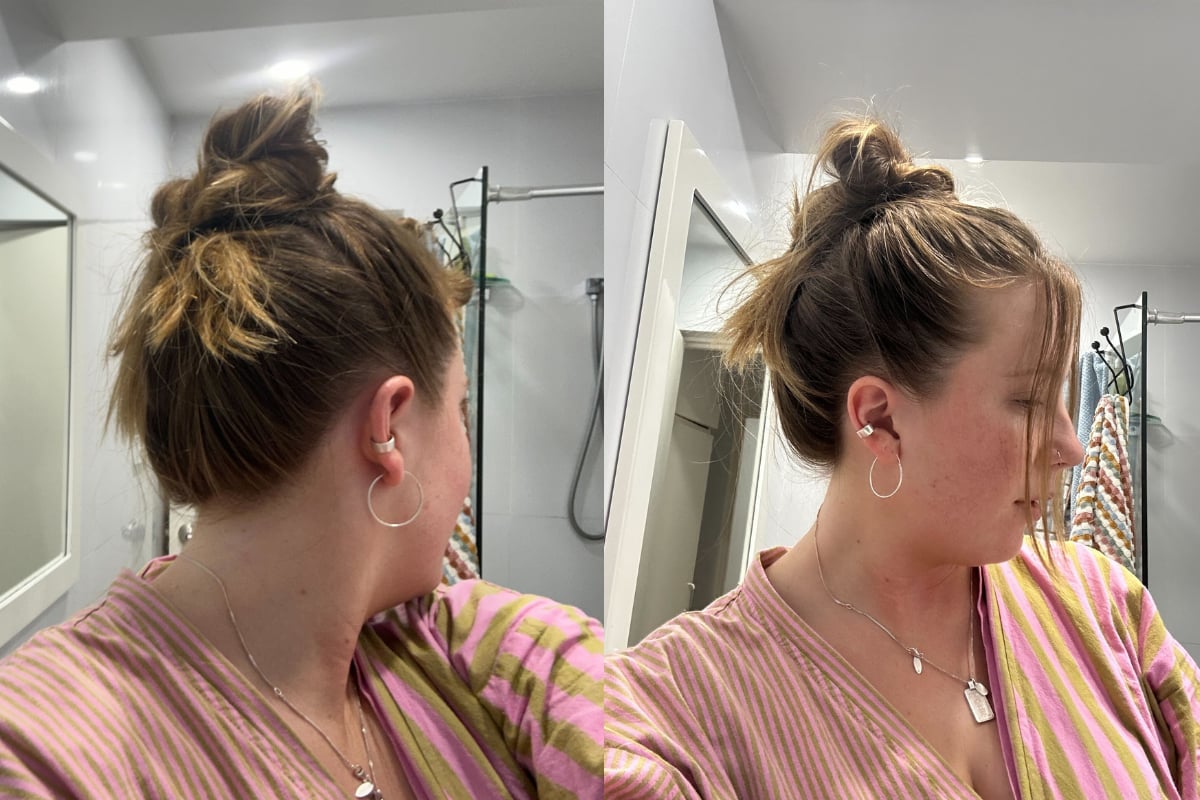
Image: Supplied.
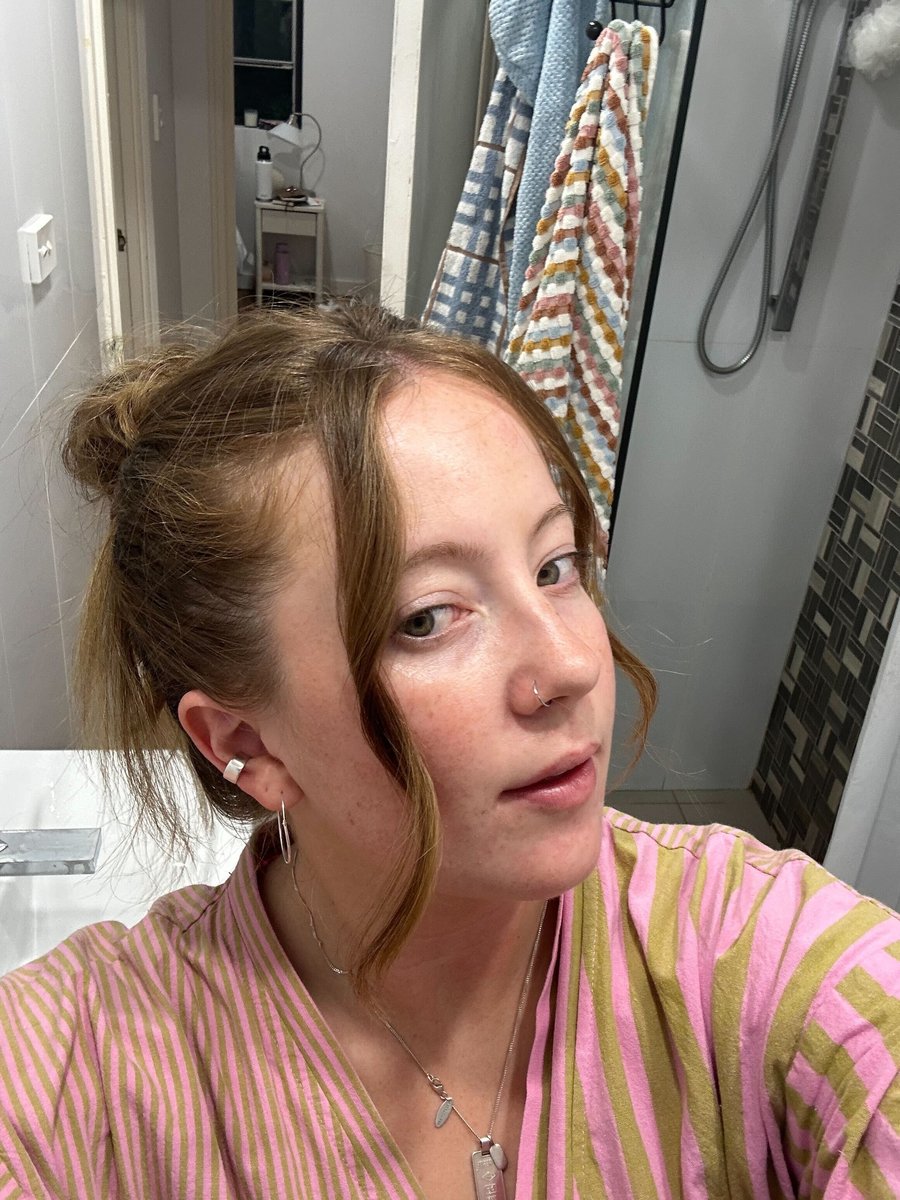
Image: Supplied.

Image: Supplied.
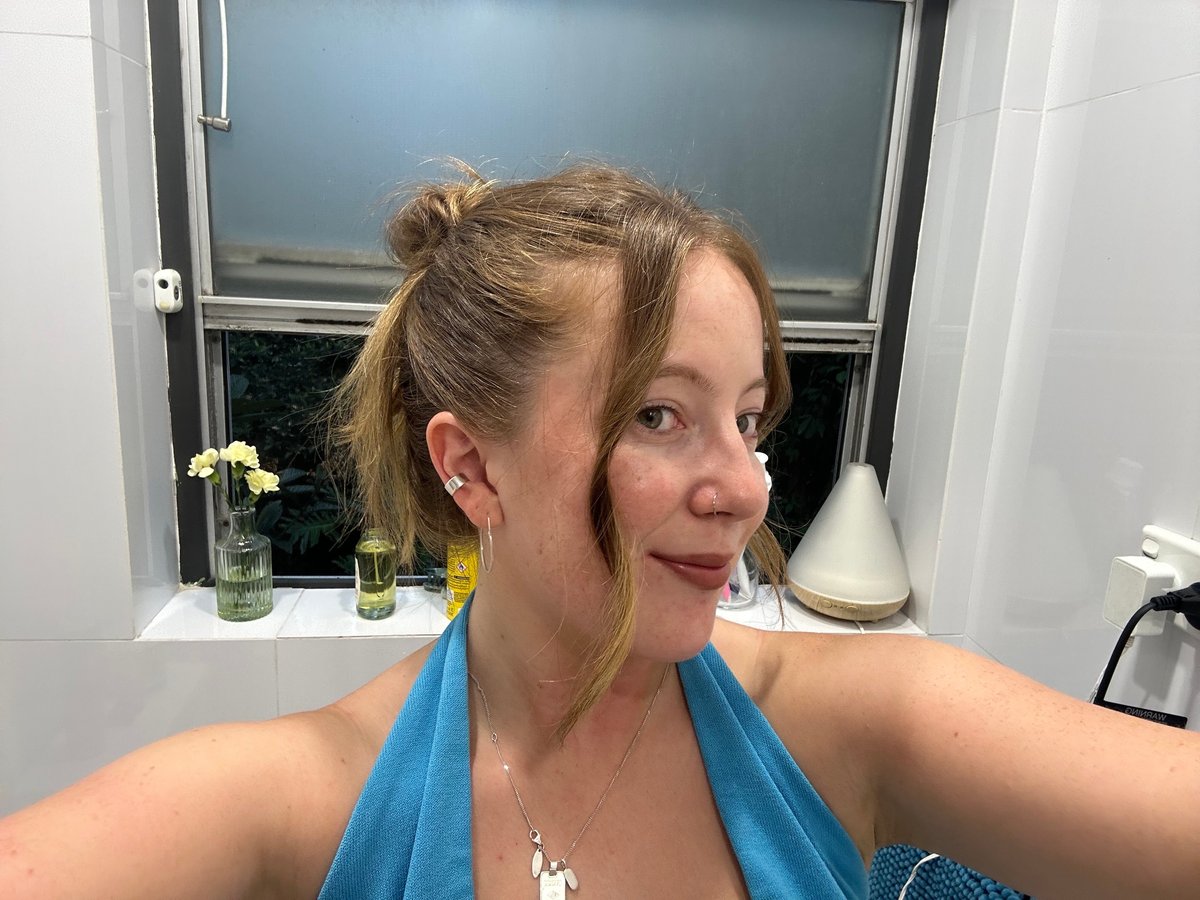
Image: Supplied.
Next time your hair is a bit too messy to ignore, give this updo a try. It’s a game-changer for anyone looking for a quick, stylish solution. For more beauty tips and recommendations, check out the You Beauty newsletter, join the You Beauty Facebook group, listen to the You Beauty podcast, or watch You Beauty on YouTube.
At our platform, we independently curate and write about products we love and think you should know about. If you purchase a product we recommend, we may earn a small commission.
Feature image: Supplied.