Transform Your Space with a Unique DIY Wall Hanging Planter
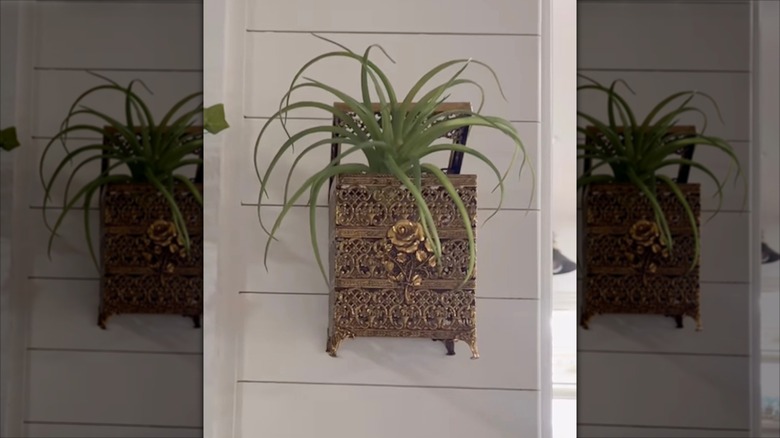
If you’re tired of seeing the same old basket planter DIYs over and over on social media, it might be time to think outside the box. While baskets are a classic choice for planters, there are plenty of unconventional options that can add a unique touch to your home decor. One such idea is to repurpose an old brass tissue box cover into a stunning wall hanging planter. This creative project not only gives new life to an outdated item but also adds a vintage charm to any room.
Where to Find Your Brass Tissue Box Cover
The first step in this DIY project is finding a suitable brass tissue box cover. These vintage pieces can often be found at local thrift stores or secondhand shops. If you have trouble locating one in person, online marketplaces like eBay offer a wide selection of secondhand items, including various styles of brass tissue box covers. Once you’ve found the perfect piece, you’re ready to start transforming it into a functional and decorative planter.
Choosing Your Plant
Now that you have your brass tissue box cover, the next step is selecting a plant to place inside. A faux plant is an excellent option for this project, as it requires no maintenance and can easily fit into the space. However, if you’re a true green thumb and want to use a live plant, there are a few additional steps to consider. You’ll need to line the box with an old plastic bottle that has been cut in half or to the size of your planter. Poke drainage holes in the bottom of the bottle and use hot glue to attach it to the inside walls of the box. Fill the bottle with potting soil and add your chosen plant.
How to Modify the Tissue Box
Depending on the design of your tissue box cover, you may need to make some modifications. For boxes with a lid attached by a hinge, you can lift the lid and place the faux plant inside, allowing the leaves to hold it in place or using a small amount of hot glue to secure it. If the lid doesn’t stay open on its own, apply a drop of hot glue to the hinges to keep it in place. Alternatively, you can seal the lid shut by gluing around the top and closing it. Let it dry and then flip the entire piece upside down, using the open bottom as the top of the planter.
For tissue box covers without opening lids, simply flip the whole thing upside down. This will create a natural opening for the plant to be placed inside.
Hanging Your New Planter
Once your planter is ready, it’s time to hang it on the wall. Hammer a nail into the desired location, and if your tissue box cover is solid brass, consider attaching a sawtooth hanger to the back for added stability. If your box has openings in the design, you can skip the hanger and use the openings to hang it on a nail or two.
Final Touches
With your brass tissue box planter securely hung on the wall, you’re all set to enjoy a unique and stylish way to display your plants. Whether you choose a faux or live plant, this DIY project is a great way to add personality to your living space while giving new life to an old item.