
Craving a classic chocolate bar but looking for a healthier, more inclusive option? Look no further! We’ve got a sensational recipe that recreates the beloved Snickers bar, all while being completely vegan and gluten-free. This means everyone can indulge in this delightful treat, regardless of dietary restrictions. What’s more, you can easily dial down the sugar content by opting for dates, which lend a beautiful natural sweetness to the caramel filling. For an extra refreshing twist, why not pop these homemade bars in the freezer? They’re perfect for a quick, guilt-free pick-me-up on a warm Australian afternoon.
Homemade Vegan & Gluten-Free Snickers Bars: A Step-by-Step Guide
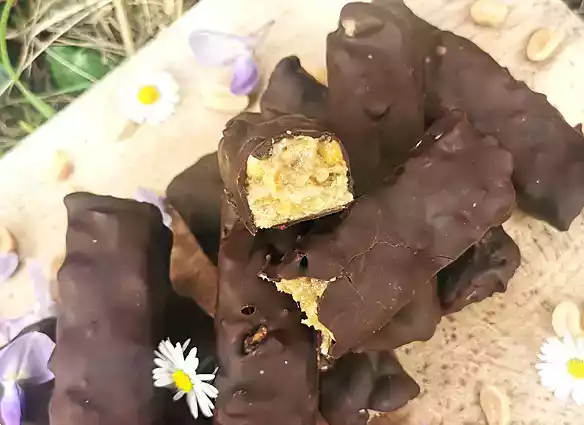
This recipe breaks down the creation of your guilt-free Snickers into two delicious components: the “caramel” filling and the “dough” base, followed by assembly and that essential chocolate coating.
Ingredients
For the “Caramel”:
- 150g pitted dates
- 1 tablespoon peanut butter
- 1 tablespoon almond milk
- 1 tablespoon soy yogurt
For the “Dough”:
- 80g rolled oats (ensure they are certified gluten-free if necessary)
- 2 tablespoons almond flour
- 2 generous handfuls of unsalted peanuts
- 150g dark chocolate (check for vegan and dairy-free certification)
Equipment You’ll Need
- A reliable blender
- A rectangular mould or baking tin
- Parchment paper (also known as baking paper)
Preparation Method
Let’s get cracking on these sensational Snickers bars!
Step 1: Prepare the Dates
Begin by soaking your pitted dates in warm water for approximately 10 minutes. This simple step is crucial as it softens the dates, making them much easier to blend into a smooth, luscious caramel texture in the next stage.
Step 2: Craft the “Caramel” Filling
Once the dates have softened, drain them thoroughly. Transfer the drained dates into your blender. Add the peanut butter, soy yogurt, and almond milk. Blend these ingredients together until you achieve a smooth, thick, and sticky consistency that resembles traditional caramel. Set this delicious mixture aside for later.
Step 3: Create the “Dough” Base
In the same blender (no need to wash it out!), add the rolled oats, almond flour, and 2 tablespoons of the “caramel” mixture you just prepared. Blend these ingredients until they come together to form a thick, cohesive dough. This will be the satisfying base of your Snickers bars.

Step 4: Assemble the Base Layer
Prepare your rectangular mould by lining it with parchment paper. This is a handy trick that will make removing and cutting your bars a breeze later on. Evenly press the “dough” mixture into the prepared mould, ensuring a compact and uniform layer across the entire surface.

Step 5: Layer on the “Caramel”
Generously spread the prepared “caramel” filling over the “dough” base. Make sure to cover the entire surface edge-to-edge, creating that signature gooey layer.

Step 6: Add the Peanut Crunch
Now for that essential crunch! Sprinkle the unsalted peanuts evenly over the “caramel” layer. Gently press them down with your fingers or the back of a spoon so they embed slightly into the caramel, ensuring they’ll stay put.

Step 7: Chill and Set
Carefully place the entire mould into the freezer. Allow it to chill and firm up for at least 1.5 hours. Once the time is up, remove the mould from the freezer. The mixture should be firm enough to handle. Invert the mould onto a clean surface and peel away the parchment paper. Now, using a sharp knife, cut the slab into bars, aiming for a width of about 2 cm – just like a classic Snickers!

Step 8: The Chocolate Coating
Prepare a double boiler (or a heatproof bowl set over a pan of simmering water). Gently melt the dark chocolate in the double boiler, stirring occasionally until it’s completely smooth and liquid.

Step 9: Dip and Decorate
Take each of your cut bars and carefully dip them into the melted chocolate, ensuring they are fully coated. You can use a fork or a skewer to help with this process. Once coated, place the bars on a wire rack set over a tray to allow any excess chocolate to drip off. Finally, transfer the rack with the chocolate-coated bars into the fridge for about 20 minutes to allow the chocolate to set completely. Once firm, your delicious, homemade vegan and gluten-free Snickers bars are ready to be enjoyed!
More Delicious Recipes to Try:
- Beetroot Tikki: A healthy and easy appetizer that’s bursting with flavour.
- Dill Leaves Pakora: Crispy, golden fritters perfect for a snack or side dish.
- Homemade Luxardo Maraschino Cherries and Pralines: Elevate your cocktails and desserts with these gourmet homemade treats.