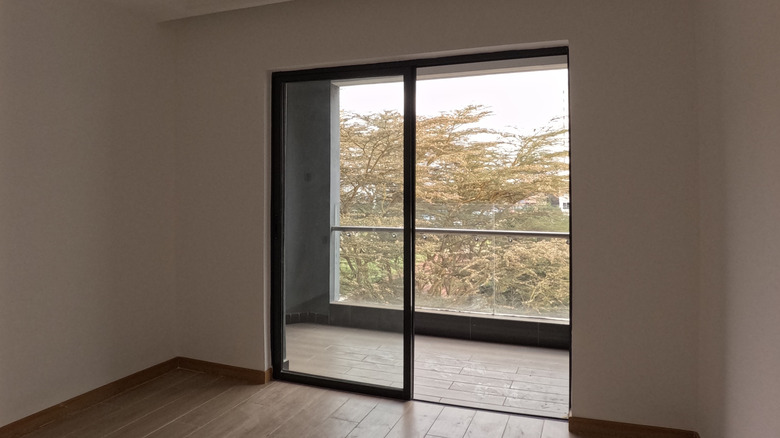
Sliding doors are a popular feature in many homes due to their ability to let in natural light. However, while they offer functionality, they may not always be visually appealing. Often, the issue lies not with the drapes or blinds but with the style of the door and its framing — or lack thereof. One downside of sliding glass doors that is rarely discussed is that without trim, they can look unfinished. In some cases, the frame around the door might not be installed at all, or the existing trim could be deteriorating.
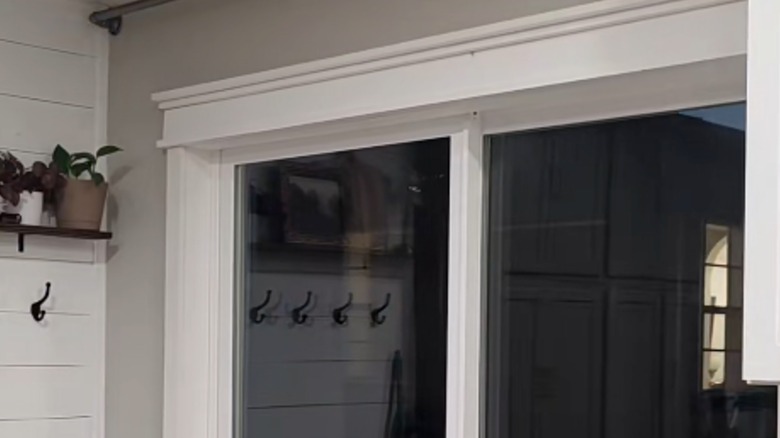
To transform your sliding doors into a more attractive feature, there are several affordable DIY options available. One such approach involves using wood or trim pieces to create a beautiful window casing that adds visual depth to the space. By updating the window trim, you can move your sliding doors away from the outdated ’80s aesthetic. This project can be completed on a budget, with some homeowners managing to do it for under $100.
The materials needed for this project include wood trim such as 1x2s, 1x3s, 1x4s, or 1x6s, as well as a nail gun, wood filler, caulk, sandpaper, wood saws, and paint. If creating your own crafted trim feels challenging, you can opt for decorative trim instead.
Steps to Frame Your Sliding Glass Door with Trim
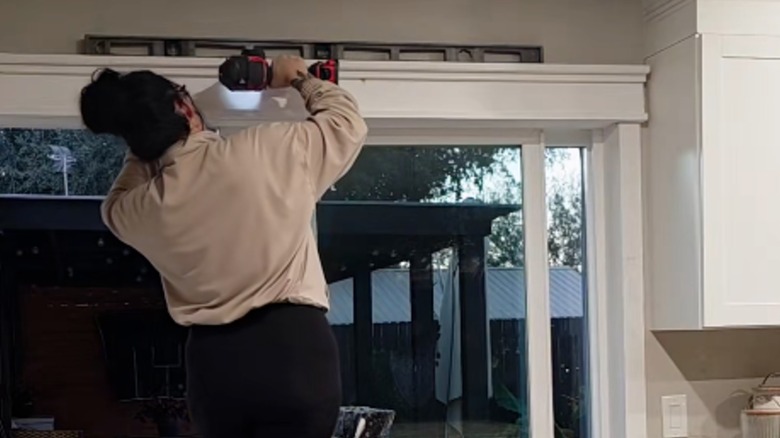
Depending on the scale and design of your project, the trim requirements may vary. Generally, you’ll want to use wood trim pieces with a one-inch width. Begin by removing any existing trim or baseboards where your new trim will be installed. You may also want to paint your trim pieces before cutting and assembling them. While white trim is an option, there are many other stunning colors available that can add a fresh look to your space.
If there are gaps between the sliding door frame and the wall, cover those areas with trim before proceeding with the framing. Start by cutting and assembling your boards for the frame. For example, you could use a 1×6 base and attach 1x2s on the slim sides of the board. Then, nail a 1×4 on top of one of the 1x2s to create a gradual stair-step effect. Use a level and drill to attach the header board above your sliding doors before securing the side pieces. 1x4s or 1x6s are ideal for framing the sides of your sliding door.
Additional Considerations When Adding Trim
This DIY project is versatile and can be approached in multiple ways. If you’re looking for added security, you could use glue to attach the boards to the wall before securing them completely with a nail gun. Another option is to install the side pieces of the frame before the header board. You might also choose to use decorative trim with a ribbed or beveled edge instead of a plain 1×2 on the header to add texture to the top piece of your frame.
For those with exceptionally long sliding doors, there may be a few additional steps. If your hardware store has limitations on trim length, you might need to install two separate boards to create an extended header. In this case, a shim piece can help connect the header boards and ensure everything remains flush and level. It’s also worth noting that you don’t have to paint the boards before installation. For a more professional finish, consider sanding, caulking, and adding wood filler before painting.